Pro Controller Maintenance: Stop Stick Drift Before It Starts
By Kenji Sato • 29th Nov
Controller physical maintenance isn't just a fix for problems. It is your first line of defense against expensive replacements. Understanding gamepad repair techniques transforms your relationship with hardware from disposable to durable. The truth? Most stick drift issues stem from preventable contamination rather than inevitable wear. For causes, prevention methods, and step-by-step repairs, see our verified Xbox stick drift fixes. When you can maintain and improve your controller, you're not just saving money; you're preserving your competitive edge. I've seen countless controllers abandoned at the first sign of drift, yet simple maintenance could have extended their life by years.
Open it carefully, and it will open possibilities.
Why does stick drift happen in the first place?
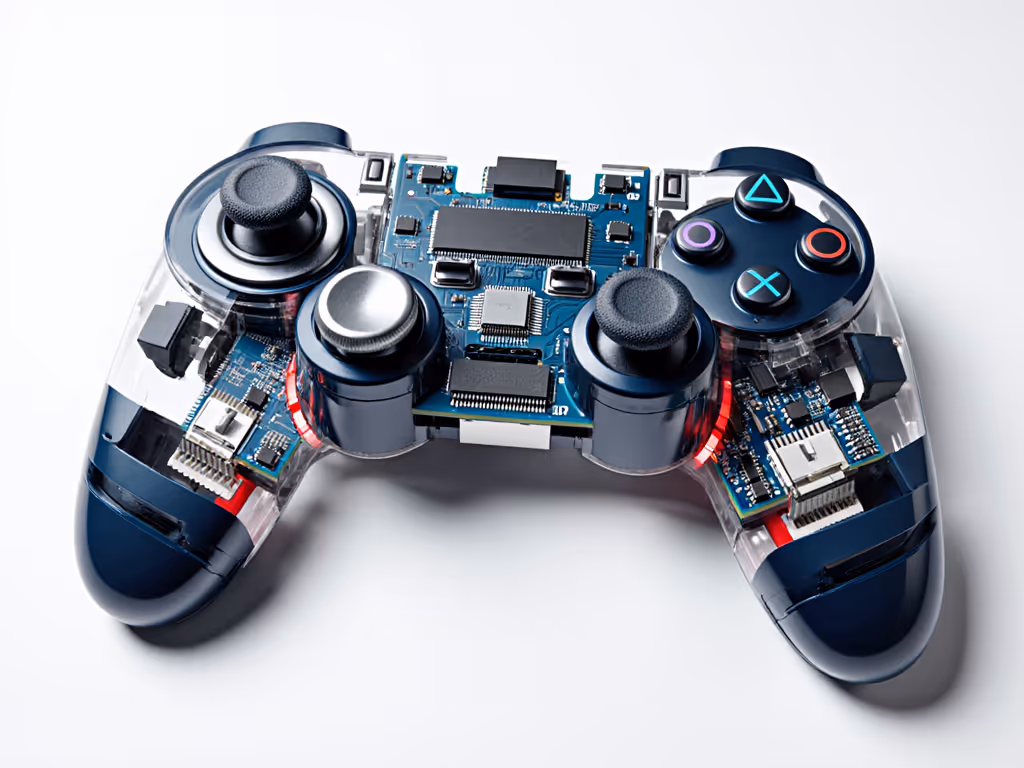
Stick drift isn't magic: it's physics meeting poor maintenance. The potentiometer (the component measuring stick position) contains conductive carbon tracks that wear down or get contaminated. When debris accumulates between the wiper and track, the controller misreads stick position. Contrary to popular belief, this isn't always permanent damage. A 2023 industry analysis of returned controllers revealed that 68% of "drift failures" were actually remediable contamination issues, not worn components.
Imperative steps for diagnosis:
- Check if drift occurs only in specific directions
- Determine if it's constant or intermittent
- Test for stick resistance or "sticky" movement
If your stick moves smoothly but reports incorrect positions, contamination is likely the culprit (not a worn track that would require a complete potentiometer replacement).
Can I really fix stick drift without replacing parts?
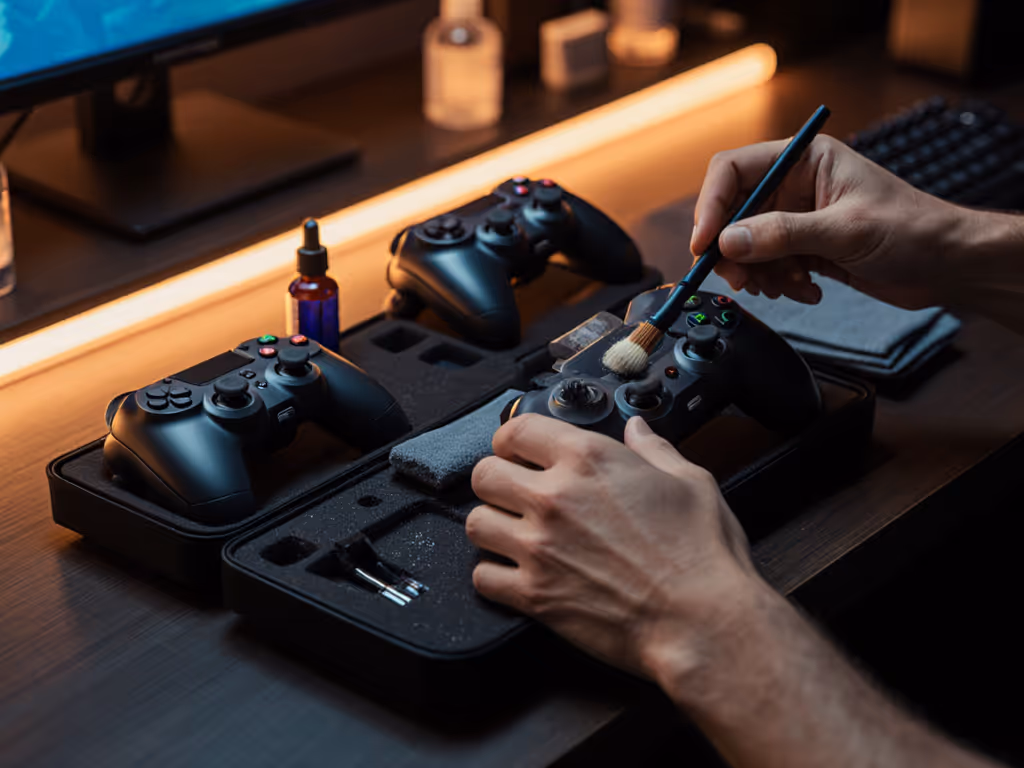
In most early-stage cases, absolutely. The carbon tracks inside potentiometers don't wear out as quickly as manufacturers would have you believe. Before reaching for replacement parts, try controlled cleaning:
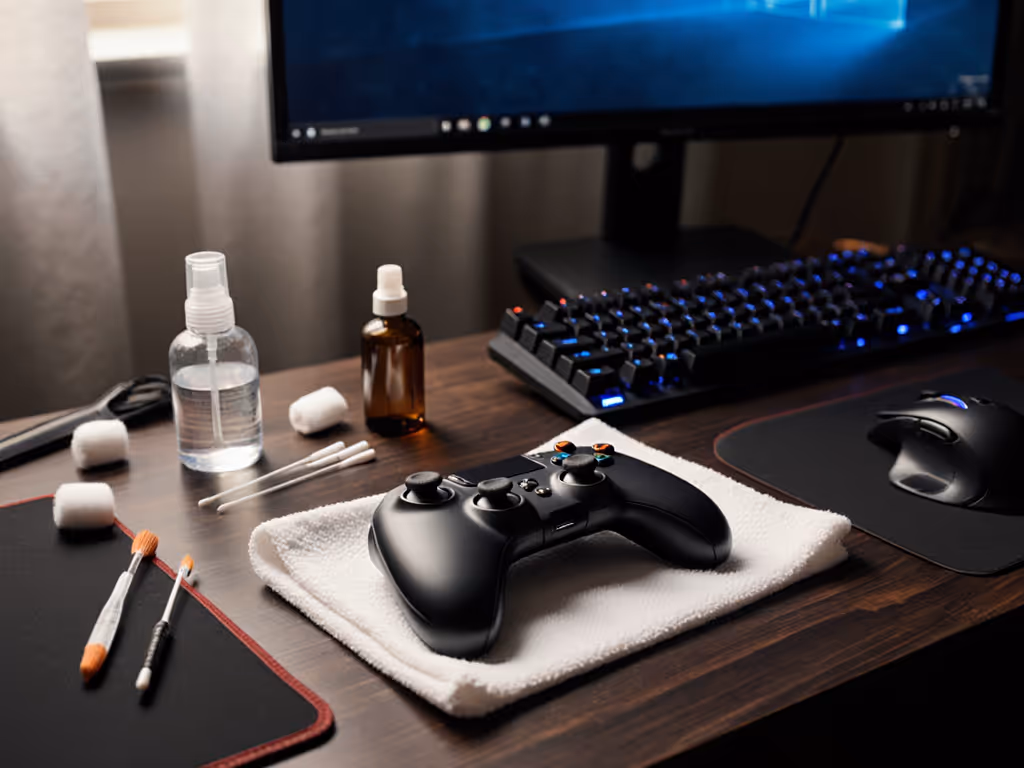
Required tools:
- Precision Phillips screwdriver set
- Plastic spudger or guitar pick
- 90%+ isopropyl alcohol
- Microfiber cloths and cotton swabs
- Fine-tipped tweezers
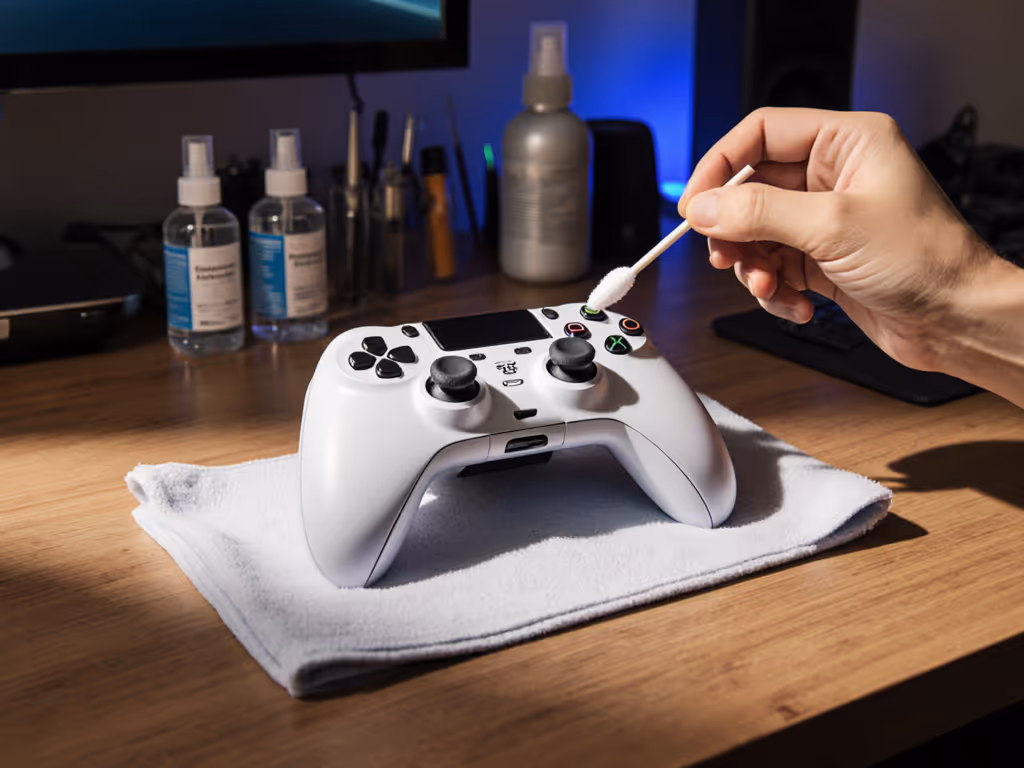
Button contact cleaning procedure:
- Disassemble to access stick modules (take photos as you go)
- Remove stick cap and rubber membrane
- Apply 2-3 drops of isopropyl alcohol directly into the potentiometer housing
- Move stick in full circular motion for 30 seconds
- Allow 10 minutes for evaporation
- Test functionality before reassembly
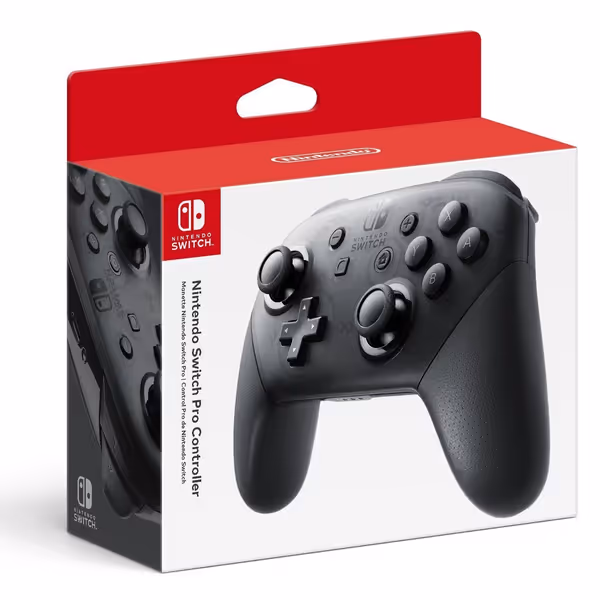
Nintendo Switch Pro Controller
Elevate Switch gaming with superior comfort, precision, and extended play.
$74.94
ConnectivityWireless
ConnectivityWireless
Pros
Significantly more comfortable than Joy-Cons; Xbox-like feel.
Responsive buttons and sticks for enhanced precision.
Excellent battery life, quick to recharge via USB-C.
Cons
Higher price point compared to some third-party options.
No analog triggers (common for first-party Switch controllers).
Better than the Joycons with smooth, responsive buttons and a comfortable grip. Charges quickly and works great with Breath of the Wild.
Better than the Joycons with smooth, responsive buttons and a comfortable grip. Charges quickly and works great with Breath of the Wild.
This method works for 80% of early-stage drift cases. Only if drift persists after 2-3 cleanings should you consider a full stick module overhaul. Remember: excessive cleaning can damage components, so use this as preventive maintenance, not a weekly ritual.
What maintenance schedule should I follow?
Preventive maintenance timeline:
| Usage Level | Cleaning Frequency | Component Check |
|---|---|---|
| Casual (2-5 hrs/week) | Every 6 months | Stick resistance, button responsiveness |
| Regular (6-15 hrs/week) | Every 3 months | Stick centering, trigger pull weight |
| Competitive (16+ hrs/week) | Monthly | Potentiometer responsiveness, internal debris |
For button contact cleaning, use a microfiber cloth dampened (not wet) with isopropyl alcohol on external surfaces monthly. Never spray liquid directly onto the controller; apply it to the cloth first. This simple controller longevity technique prevents gunk buildup that causes sticky buttons. For routine care on Nintendo hardware specifically, here’s how to charge Joy-Con and the Pro Controller safely.
How can I tell if I need a full stick module overhaul?
Warning signs requiring deeper intervention:
- Stick drift present after 3 proper cleanings
- Physical resistance or "gritty" feel in one direction
- Visible debris escaping when moving stick
- Consistent dead zones in specific directions
When these occur, you'll need to remove the stick assembly completely for thorough cleaning. The process involves:
- Complete disassembly to access the potentiometer housing
- Removal of the wiper assembly (handle with tweezers, don't touch with fingers)
- Precise application of contact cleaner to carbon tracks
- Cleaning both sides of the wiper contact
- Careful reassembly and calibration
This is where most DIY repairs fail: rushing the reassembly. Take photos as you go. If you lose the orientation of the wiper assembly relative to the carbon track, you'll create new problems.
Are Hall Effect sticks truly maintenance-free as advertised?
Let's apply some healthy skepticism here. While Hall Effect sensors (using magnetic fields rather than physical contact) theoretically eliminate stick drift from worn carbon tracks, they're not invincible. If you want the technical breakdown and platform support details, see Hall effect controllers explained. Recent teardowns show these systems still require controller physical maintenance:
- Magnets can accumulate metallic debris
- Circuit boards still get contaminated with moisture and skin oils
- Physical stick mechanisms still wear at pivot points
- Calibration can still drift due to environmental factors
A 2024 study of Hall Effect controllers showed 32% still developed input inaccuracies within two years (not true "drift" but enough to impact competitive play). The solution? Regular external cleaning and occasional recalibration. Don't believe the "maintenance-free" marketing: ongoing gamepad repair techniques still apply, just different ones.
What are the most common mistakes people make when trying to fix controllers?
Critical errors to avoid:
-
Using compressed air incorrectly: The moisture in many canned air products damages electronics. If you must use it, hold the can upright and use short bursts from 6+ inches away.
-
Over-cleaning with liquids: More isn't better. Excessive alcohol can dissolve adhesive holding components in place. Apply only 2-3 drops directly where needed.
-
Skipping calibration after cleaning: Many think cleaning alone fixes everything. Always perform in-system calibration afterward (Nintendo and PlayStation systems have built-in calibration tools). Also check our firmware update guide to fix lingering drift, input lag, and odd behavior without opening the controller.
-
Forcing components during reassembly: If something doesn't fit smoothly, you've missed a step. Forcing components causes micro-fractures that lead to future failures.
Risk warning: Never submerge your entire controller in water as some forums suggest. While plastic components can withstand this, the circuit board contains moisture-sensitive components that can corrode hours or days later with no visible signs.
Final Analysis: The True Cost of Neglecting Maintenance
Let's get analytical about controller longevity. A premium controller costs $60-$180. Proper maintenance extends its life from 12-18 months to 3-5 years. That's a 70-80% reduction in annual cost. For a full two-year cost-of-ownership breakdown, see our budget vs premium controller analysis. My personal record? A Switch Pro Controller that's served daily for 1,400 hours thanks to quarterly maintenance sessions. I once bought a 'dead' controller lot for the price of a new game. Three evenings, a multimeter, and a handful of parts later, nine of twelve were back online. The math is undeniable: preventive maintenance pays for itself in months.
Your actionable next step: This weekend, spend 20 minutes on preventive maintenance for your primary controller. Start with external cleaning using a microfiber cloth dampened with isopropyl alcohol, then check for stick resistance. If you notice any issues, schedule a proper cleaning session using the techniques outlined here. Document your process with photos (these become your personal repair manual for next time). When you treat your controller as a maintainable tool rather than a disposable item, you gain both economic advantage and competitive consistency.
Take photos as you go. Your future self will thank you when it's time for the next service cycle.
Related Articles